
Uploading Files
Learn to properly upload files to Cascade
Properly Uploading Files to Cascade
Uploading files to Cascade isn't as simple as saving files to your desktop. Cascade is a shared workspace, for one. Because of this we need to be mindful not only of how uploading files to Cascade operates in the backend, we also need to follow certain standards to make our uploaded assets easy to understand and identify.
This page will cover:
If you'd like to take a deep-dive, check out our Frequently Asked Questions
How to upload files to Cascade
Before uploading a file to Cascade, you'll want to make sure that's where your file needs to live. Figuring this out on the front end will save you time and frustration in the future.
Is your file something that will be updating periodically?
For example, is it a student handbook PDF or form that gets revised year to year? If so, that document should not be uploaded and live in Cascade, it should reside in Box or another similar service where the document can be linked to. Visit Storing and Updating PDFs for more information on how to host, link to, and keep your cyclical files updated in Box.
Is your file something that will remain on the website for the foreseeable future?
For example, is it a "hero" image for a web page or a "checkerboard" image for the checkerboard module? If that's the case, follow the instructions below to upload your files to Cascade. One final step before uploading your files: make sure they are prepped for the web (do they pass accessibility standards, are they the correct dimensions, correct file size, and acceptable file type for Cascade?).
Uploading files to Cascade
Here's the step-by-step:
- Navigate over to the folder in Cascade where you are working. For this example, we are in the Department of History folder. Once inside the folder, locate and open a folder titled, "Assets." Most files* uploaded to Cascade should be saved inside an "Assets" folder.
*Files uploaded for Student Ambassador and Alumni profiles are the exceptions.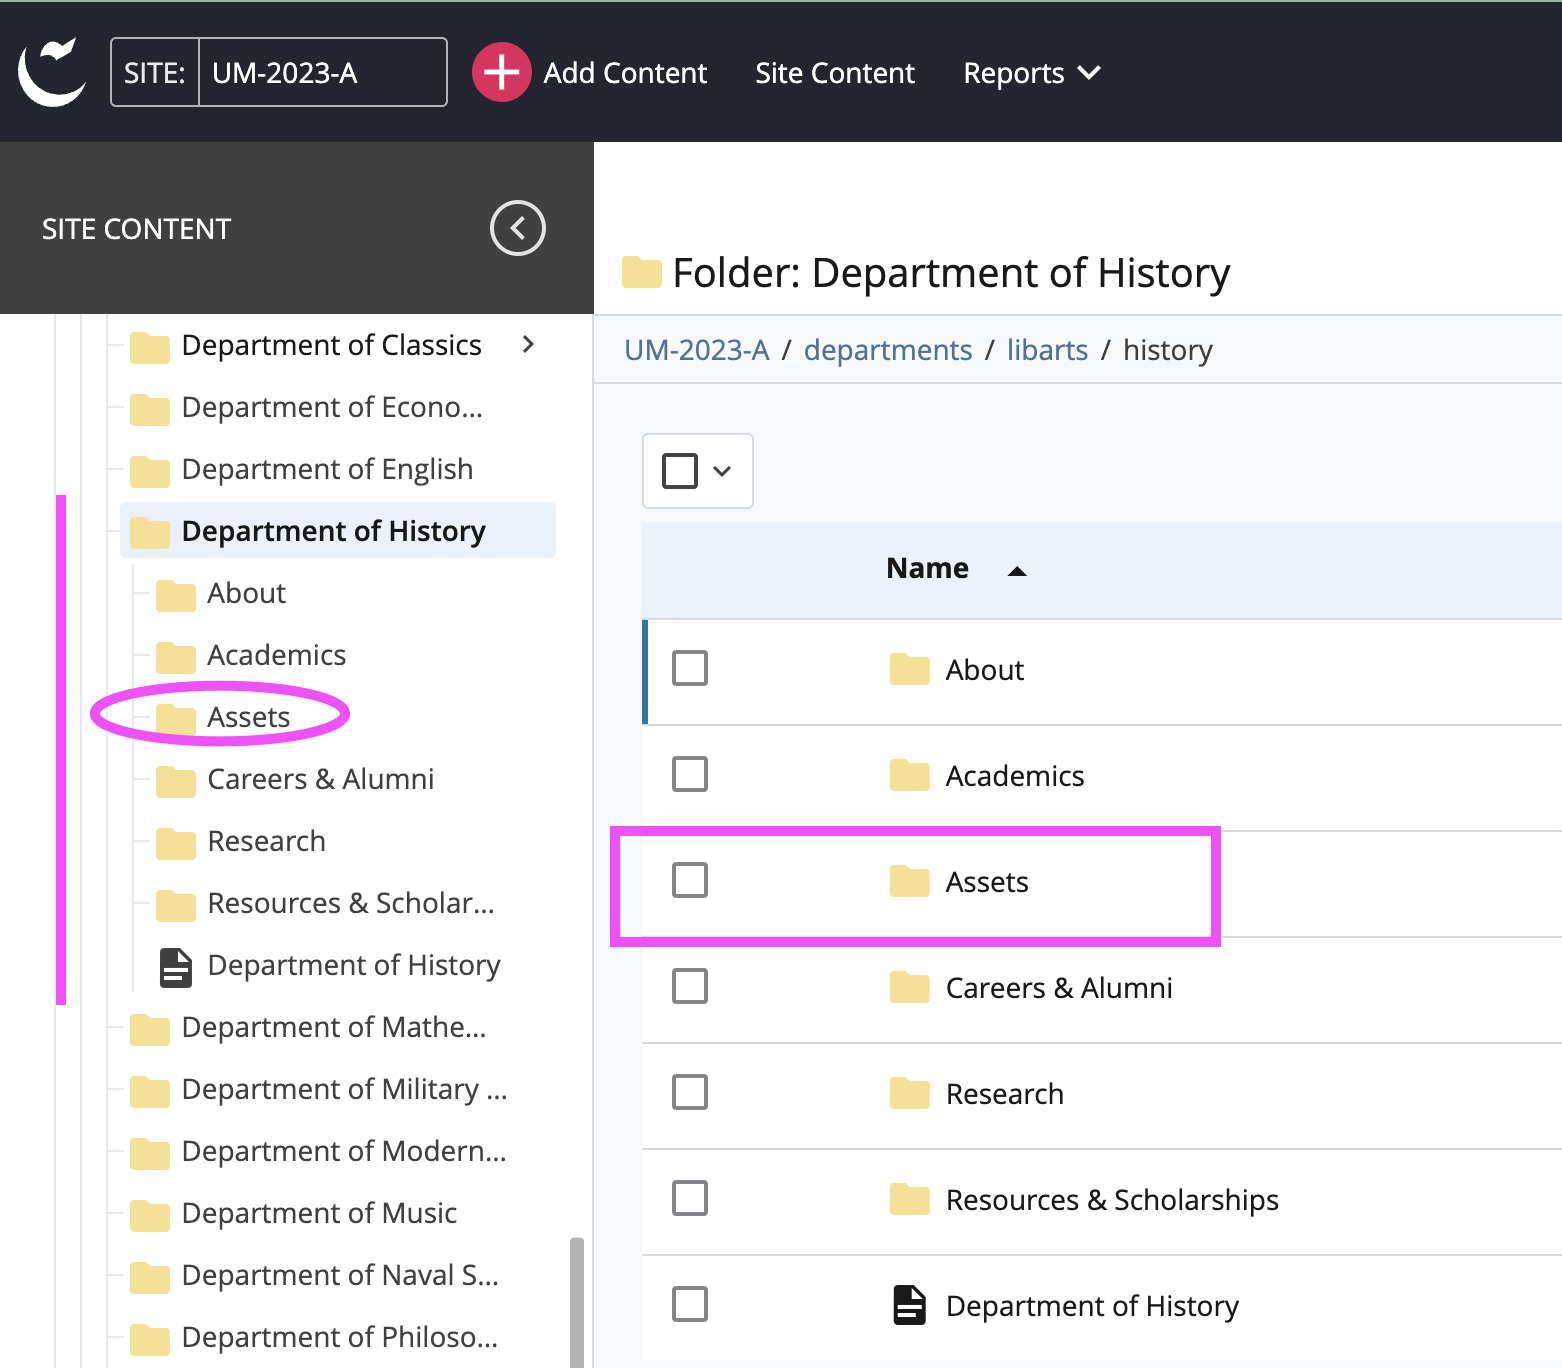
- Now that you are in the right folder, you'll want to click on the " + Add Content" button near the upper left hand corner of the window.

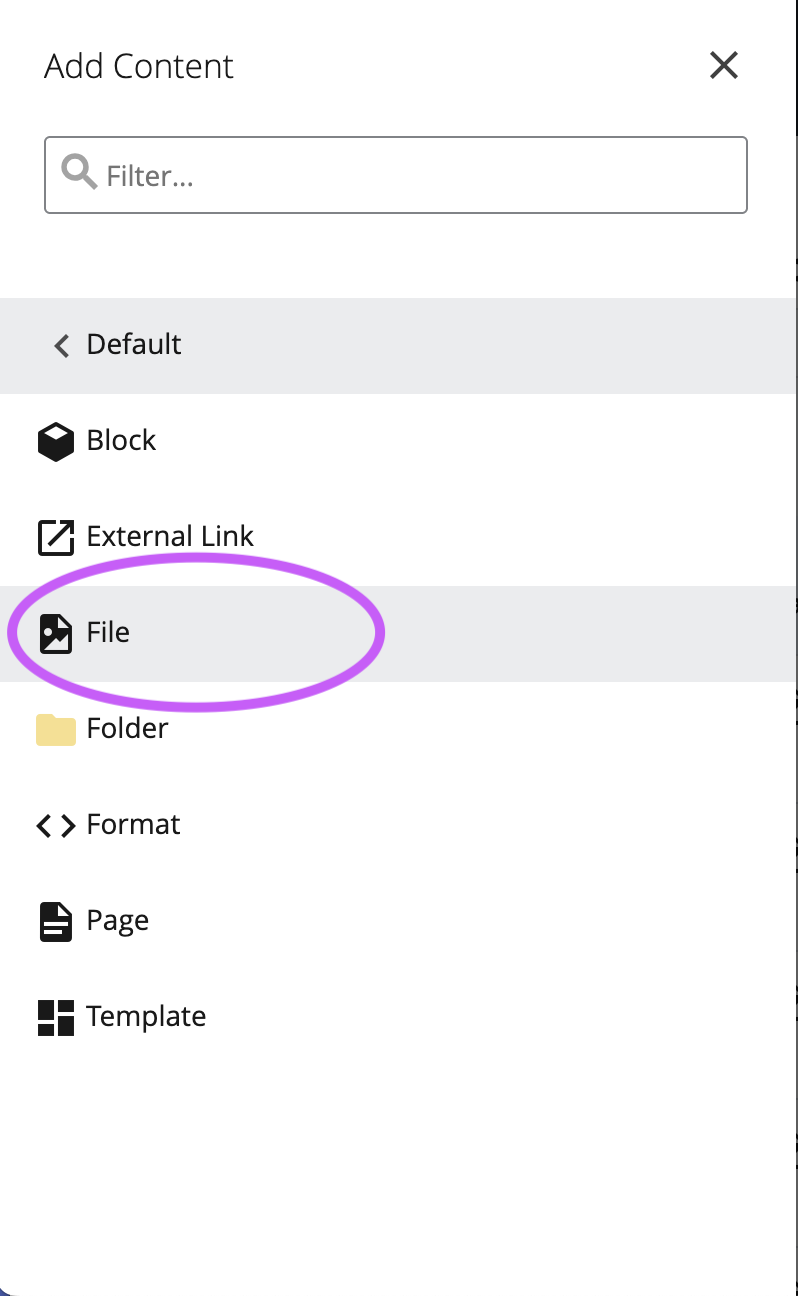
- When the next 2 options open, choose "Default" and then "File."

- Now you should see the upload dialog box. First drag your file or upload your file onto the dotted "Drop file here..." box. Then give the image or file a "File Name" and "Title." See "3 Tips For Naming Your Digital Assets" for guidance on naming your files. After that, click "Preview Draft" in upper right hand corner.

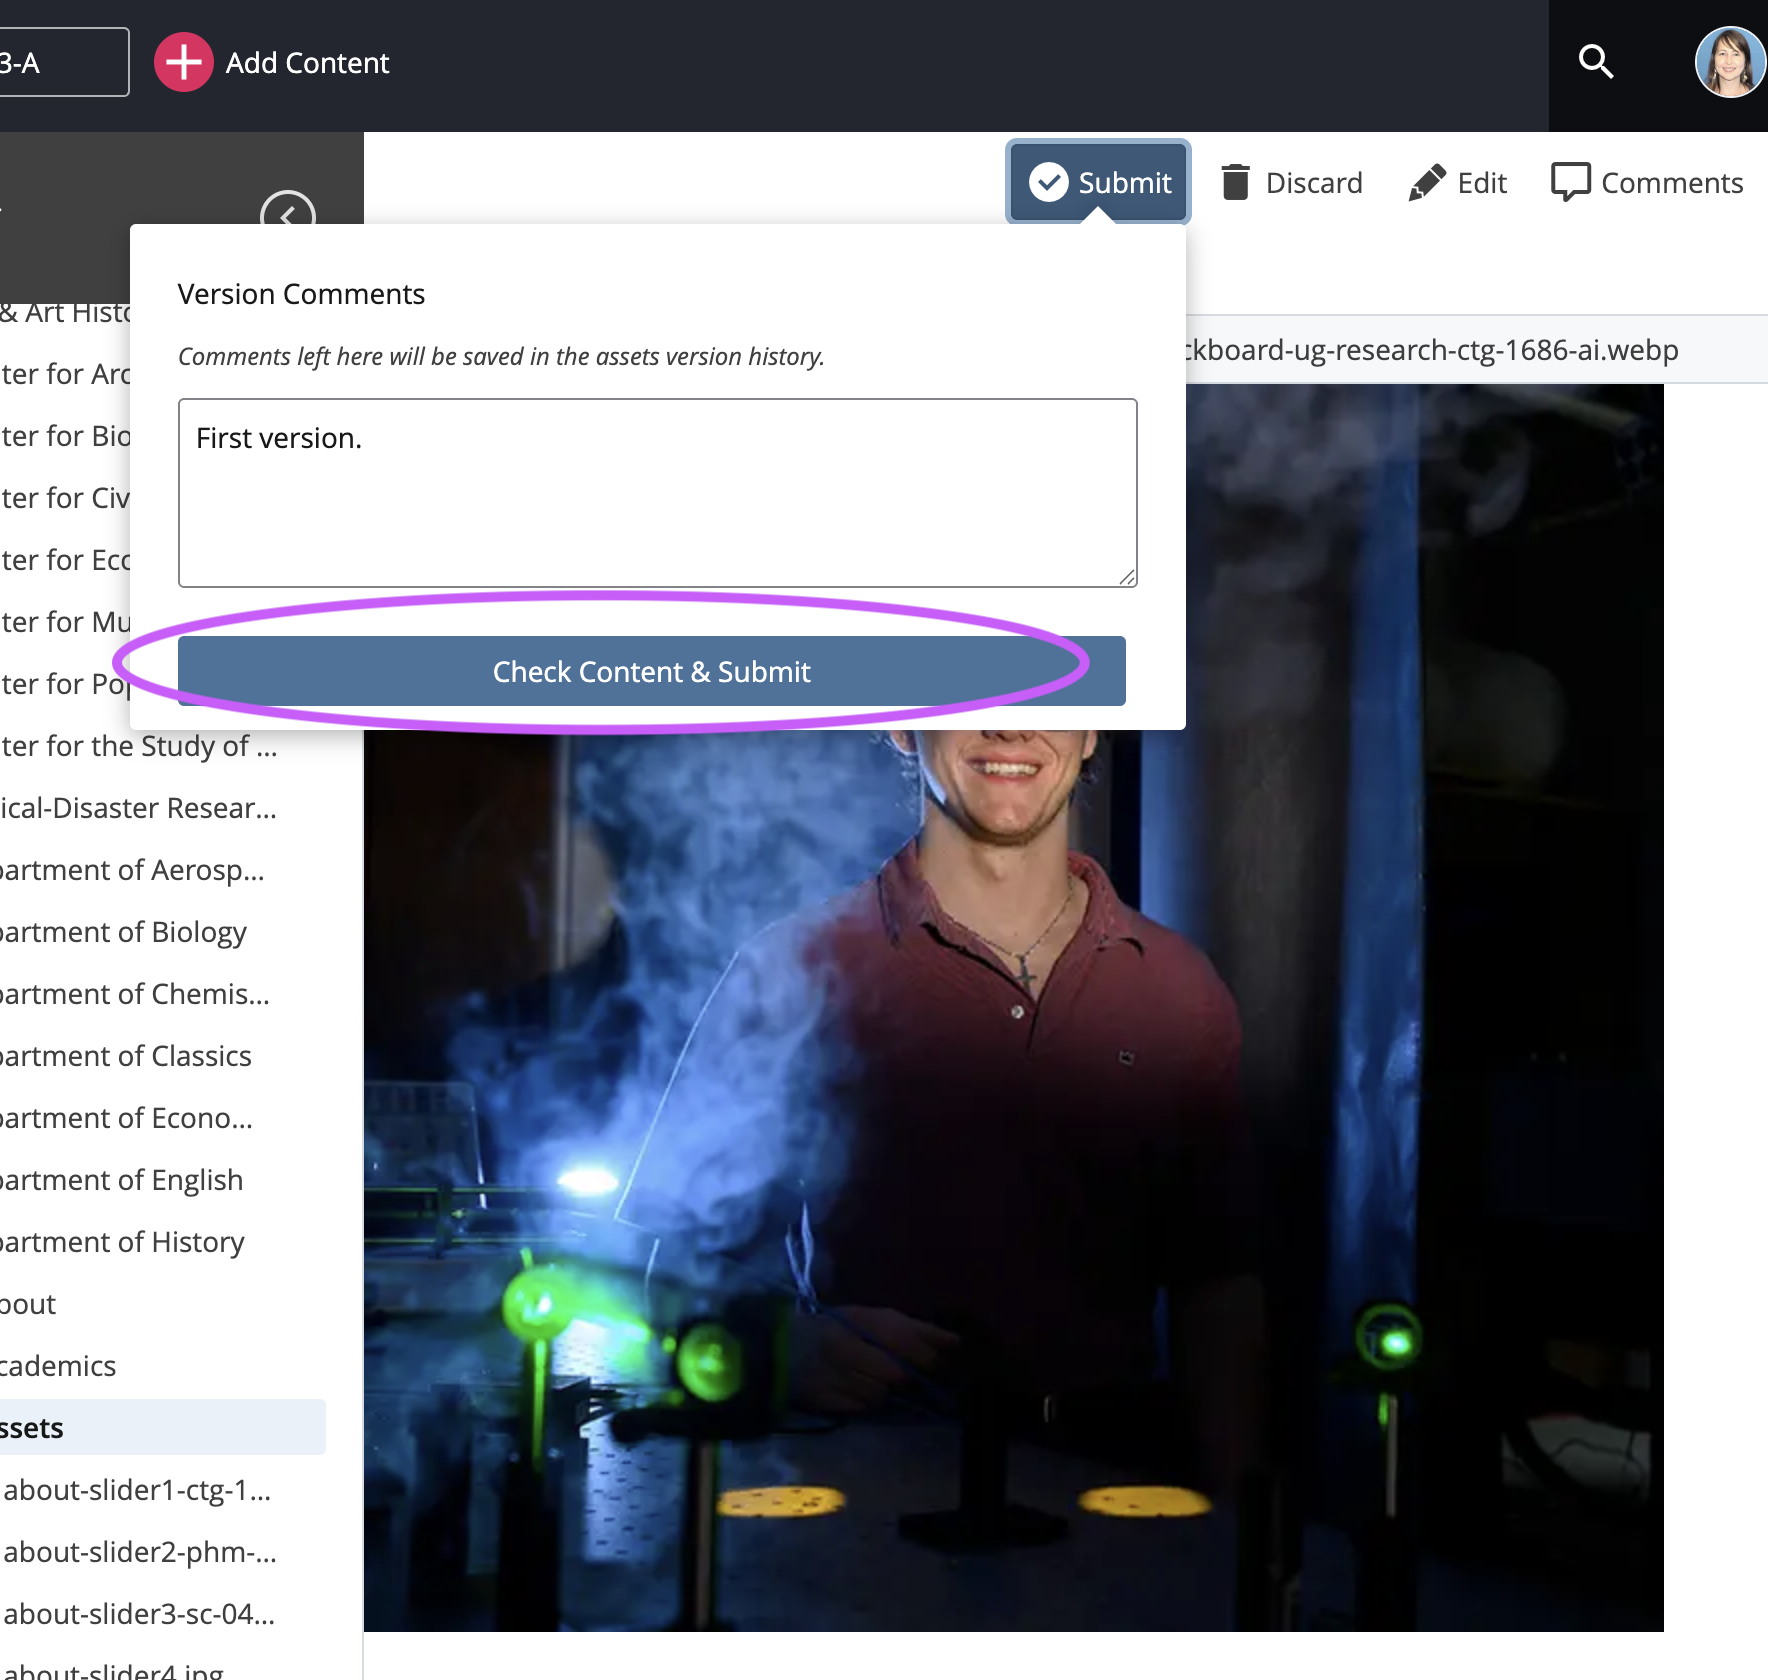
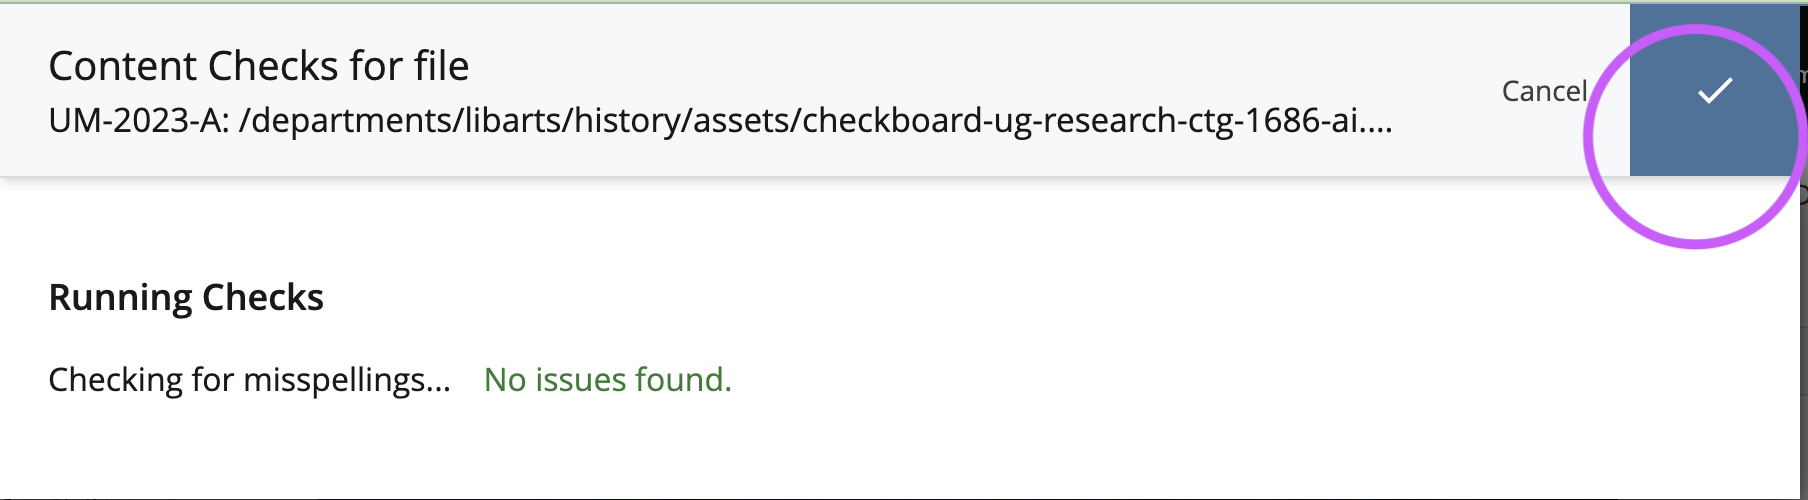
- When the next 3 options open, choose "Submit" then "Check Content & Submit," and then click on the check mark in the upper right hand corner.

- Repeat this process with all of the files you need to build out your page. Once your file(s) are uploaded to the assets folder, they are in a "bank" you can access while editing a web page.
SEO is extremely important in almost every aspect of a webpage. One of those places for SEO that get overlooked are the file names for photos. Luckily, if you optimize a file name for search engines, you can also optimize it for users at the same time.
Here’s what you should keep in mind when prioritizing SEO for file names:
- Include relevant keywords. Integrate keywords that describe the image content. Search engines can potentially use these keywords to understand and index your images for relevant searches.
- Focus on the page's content. Tailor the keywords to the webpage's content where the image will be used.
- Start with the most important keywords. The first few words in the filename are most heavily weighted by search engines, so put the most relevant keywords first.
- Match filename to alt text. For optimal SEO, consider aligning the keywords in your filename with the image's alt text description.
Organization doesn’t just help now, but it also helps us in the future. Whenever we have to look for files or figure out what they mean, the file name is going to be the first thing we see.
Here are some organizational rules to keep in mind:
- Use hyphens as separators. Separate words with hyphens (-) for readability. Avoid using underscores (_) as some website management systems might interpret them differently.
- Keep it concise. Aim for filenames under 60 characters to avoid potential display issues on web pages.
- Consider a dating system (optional). If dealing with a large number of photos, including the date in YYYYMMDD format at the beginning can be helpful for sorting, especially for images from the same event.
When it comes to organization you want to prepare for the worst version of yourself (or a peer) pulling up to their computer (e.g., tired, grumpy, or under a deadline).
Do them a favor and make everything easier by being clear and precise.
Keep the following in mind:
- Simple and understandable. Focus on clarity for anyone viewing the file name, not just yourself.
- Avoid overly creative names. Skip overly creative or technical terms that might not be clear to everyone.
- Use lowercase letters. Lowercase is universally recognized and avoids potential issues with different systems.
Here's an example combining the elements listed above.
- Original photo name. "DSC_1234.jpg" (unhelpful)
- Improved name. "ba-underwater-basket-weaving-hero-image.jpg" (so much more helpful)
This improved name incorporates relevant keywords ("underwater basket weaving," is clear and concise, and uses hyphens for separation.
Still Need Help?
Whether you're working in Cascade, MyEmma, or the Event Calendar, the Web Content team is here to help you get your message out there.